
Working with Tiles
Introduction
You’ll be working a lot with tiles in Tilesetter. These are an integral part of the workflow, which revolves around manipulating them in several ways.
This section covers the essentials for managing tiles and Sources within Tilesetter.
The Set View
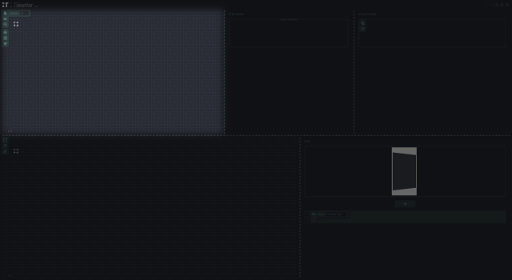
All tiles in a Tilesetter project rest in the Set View. This is a grid-based environment where tiles can freely be placed on, being readily accessible to be worked with. It is located at the top left region of the screen, and it is where most of the work happens.
Here, the left mouse button is used to select cells in the grid, and multiple cells can be selected by clicking and dragging. The right click brings up the context menu, allowing several operations to be performed on the selected cell(s).
General Controls
Selecting – Left mouse button click. Click and drag at an unselected cell to select multiple cells. Hold
Shiftto append to the current selection.Moving – Left mouse button drag at a selected cell.
Deleting –
Deletekey.Panning – Middle mouse button drag, or left mouse button drag while holding
Alt.Zooming – Mouse wheel, or
Ctrl++/Ctrl+-(Command++/Command+-on macOS).
Copying
There are two different copy operations for tiles in the Set View.
Smart Copy – Using
Ctrl+C(Command+Con macOS) or right clicking and choosing ‘Copy’ will copy tiles in such a way that tiles pasted later will reference the same Sources as the original ones. This mode does not copy image data and thus does not allow pasting outside of Tilesetter.Raw Copy – Using
Ctrl+Shift+C(Command+Shift+Con macOS) or right clicking and selecting ‘Copy Raw’ will copy tiles’ raw image data for pasting inside or outside Tilesetter.
Project Management
At the top left of the Set View you’ll find buttons for loading, saving or initializing a project.

New Project – Click the topmost icon or use
Ctrl+N(Command+Non macOS), then confirm by clicking the prompt that says “Create new project?”.Load Project – Use the middle icon, or
Ctrl+O(Command+Oon macOS).Save Project – Click the last icon or use
Ctrl+S(Command+Son macOS) to save. You’ll be prompted for a filename and location the first time, and subsequent saves will overwrite the project file.Save Project As – Hold
Shiftto click the last icon, or useCtrl+Shift+S(Command+Shift+Son macOS).
At first, the Set View starts off empty when you create a new project, so tiles must be loaded into it by importing external images.
Importing Images
Tilesetter does not contain image editing tools, so images must be imported from an external source. Imported images are automatically broken down into tiles by the grid, so it’s important to set the project’s tile size first.
Specifying the Tile Size
At the top left corner of the Set View you’ll have the option to specify the global tile size for the project. This can be changed at any time, automatically updating all existing tiles and Sources, but it’s best to define it before importing any images.
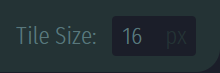
The default tile size is 16 pixels large when creating a new project, so specify the desired value by clicking the box and typing a number. Tile sizes are limited between 8 and 128 pixels large.
Once the desired tile size has been specified, external images can be imported into the Set View.
Pasting In
Raw image data can be copied from an external image editor directly into Tilesetter. Pasting is done in the Set View with
Ctrl+V(Command+Von macOS) or by right clicking and selecting ‘Paste’.Sometimes, transparency may not be retained when copying directly from some editors. However, this is not an issue when importing from files.
File Import
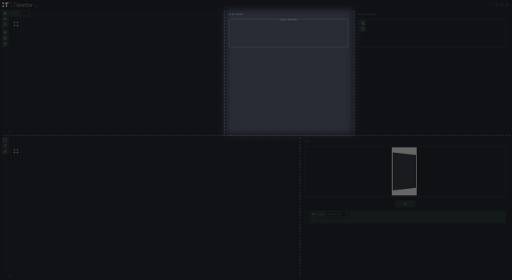
By right clicking and selecting ‘Import’ or using
Ctrl+I(Command+Ion macOS), you’ll be able to choose aPNGfile to be loaded into the Set View.
Sync Regions
Oftentimes, it might be required to make small tweaks to the artwork as you work within Tilesetter. To prevent you from having to import the updated image after every edit, Sync Regions automatically reload an image file when it’s changed, updating all relevant tiles automatically.
An image file can be loaded in as a Sync Region by right clicking and selecting ‘Create Sync Region’. Tiles created by this operation have their Sources automatically updated when the image is changed, meaning any other tile using these Sources will get updated as well.
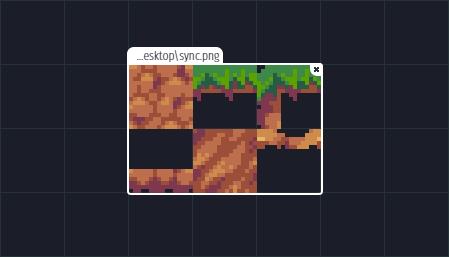
You can move the region around by dragging its name tag, and you can cancel it by clicking the ‘x’ icon at the top right of the rectangle (all tiles within are kept). If the external image is resized, the region will resize as well.
Keep in mind that paths relative to the current project file are used when loading an image through Sync Regions. If the image cannot be found at the specified path, the region’s outline will turn red.
When importing an external image into the Set View, it’ll be subdivided into tile-sized sections by the grid, creating a new tile and an accompanying Source for each cell occupied by the imported image. Cells which do not contain opaque pixels from the external image are left empty.
At this point, the newly created tiles are now ready to be worked with within Tilesetter.
Tile Properties
Each tile has its own properties regarding its visual composition and behavior. These can be managed through the Tile Properties View.
First, select a tile in the Set View to display its attributes here.
At the top, the tile’s image is displayed. Hovering the cursor on this area reveals a detailed breakdown of how the Sources used by the tile make up its final appearance.
Below are two tabs which contain the tile’s properties, ‘Composition’ and ‘Relations’.
Composition
This tab contains attributes relating to the tile’s visual composition.
For simple tiles, the current Source being used is shown here. However, many editable parameters are available when a generated tile is selected. Detailed description about those parameters can be found at ‘Configuring a Tileset’.
Relations
Here you will find parameters pertaining to the tile’s behavior and relationship to other tiles. Tileset relations are covered in ‘Tileset Behavior’.
Source Properties
Along being able to view properties of tiles, it is also possible to see properties pertaining to Sources. This is done through the Source Properties View, located at the top right region of the screen.

When a tile is loaded into the Tile Properties View, you are able to see all Sources that are being used in the Composition tab. By clicking the pencil icon at the side of a Source property, the Source is loaded into the Source Properties View.
Here, you’re able to copy the Source’s raw image data into the clipboard with the top icon, or replace its image by pasting with the bottom icon.